Squirt Plans

Squirt Plans

Saturday, August 31, 2013

Plywood Decking Installed, Flipped to Paint

I was finally able to finish installing the decking after being out for most of last week with the flu. The process started by fairing the sub-decking. I wanted a rounded dashboard and a decking curve to match, so I left the dashboard slightly raised. Next I laminated any decking that was still bare. I was really surprised how much epoxy the wood soaked up, but two coats left it looking really nice and saturated. After came the installation. I did the large piece over the bow along with a small piece next to it all at once, and then did the rest of the decking during a second time. I used a combination of screws and weights to hold the decking in place while the epoxy set.

I also cut out the hatch for the gas tank. Using an utility knife I traced the hatch and cut along my lines, making passes until my knife was through. It worked pretty well and made nice straight cuts.

I flipped the boat today and have started sanding. Next I'll use a fairing compound to fill any low spots, and hope to get my garage ready to paint. There's not much room so I'll have to get creative.


Friday, August 16, 2013

Music Installation (BIG Jambox)

While I was waiting for some more plywood to come in I started to mess around with the music situation. This spring I purchased a marine battery to go with two marine speakers and a deck I had from a previous boat. My original plan was to put the marine battery in the back of the boat next to the gas tank and mount the two speakers and deck somewhere under the plywood decking towards the tip of the bow. After getting the outboard on I decided there would likely be too much weight in the back of the boat and started to worry about proposing and planing ability.

I decided to look into a wireless speaker. I came across the 'BIG Jambox' and after reading some reviews I purchased it ($249). It's pretty pricey but it's compact, light weight, and has decent sound (great high end but not the best low end). Another thing I liked was its Bluetooth capabilities. All I have to do is turn on the Big Jambox, turn the Bluetooth setting on in my phone, and I'm ready to play music. This will work great for streaming Pandora. Of course, the BIG Jambox also has an AUX cable so I can plug it into an mp3 player.

I made a box for it, with room around the speaker but still a snug fit, and then mounted it to the main decking beam. I plan on putting something small around the front to hold it from falling out.


As a side note, my plywood came in today and I have it mostly cut except for the hatch. 

Tuesday, August 13, 2013

Plywood Decking Started

Over the last few days I was able to accomplish a few things. First, I put another coat of epoxy in a few dry areas of the sub-decking and transom. I also epoxied the plywood bench to it's support beams. I originally thought it would be nice to remove the bench but I wasn't able to think of a good reason of doing so besides cleaning.

Next, I figured out the cable and pulley system and found where my pulleys should be fastened. I have only seen a few cable and pulley setups at boat shows and a few others online. It seems there are two different ways to set it up. One with the cable ends fastened to a spring and then directly to the outboard, and a second with  the cable and spring fastened to the transom and pulleys attached to the outboard. I went with the cables and springs fastened directly to the outboard because of the height with the raised transom (though this may change). After I've painted I'll post a diagram and pictures of how I did it.

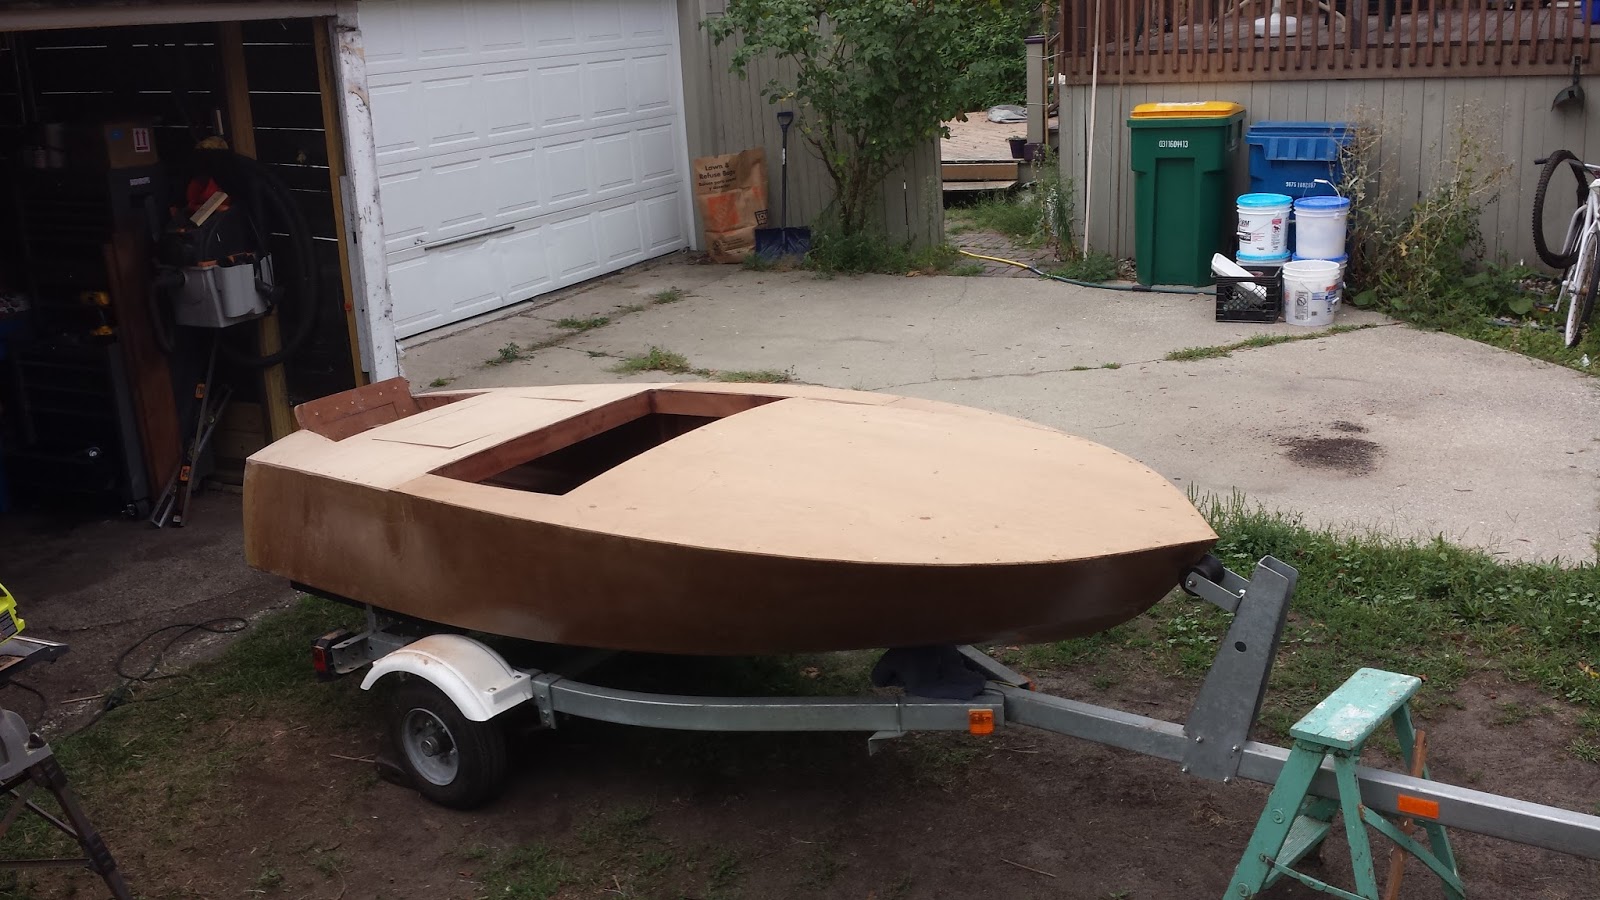
The last project I started on was the 1/4" plywood decking. I had one 4' x 8' plywood board that I was hoping would cover most of the topside and I could use scrap for the rest, but it looks like I'll be purchasing another 4'x8 board. This will also make a more even and stronger finish. I left 1/4" on all sides for margin of error when I cut and it will easily sand down when I get closer to fastening it to the sub-decking. The plywood also does not fit width wise across the boat so I will use a scrap piece that will be supported by the coaming.

The pictures below show the placement of a rear pulley, the plywood decking cut, and the area where the scrap piece will fit on the coaming. As a side note, I will be placing mahogany veneer over the transom to cover up the screw holes.


Tuesday, August 6, 2013

Added Transom Height

With my 1957 Evinrude, the shaft length is slightly longer than the 20" standard used today (I believe post 1960). This meant to get the cavitation plate level to the bottom of the transom I would need to add some height. I was able to do so this weekend and am pretty happy with the results. I epoxied three pieces of 3/4" mahogany plywood and used 1 1/4" bronze screws to get a good grip through to the transom. You can see the two pieces I added on the front side, I had wanted to make that of one piece but didn't have enough wood to make it work. It still needs some shaping and sanding but overall it has a tight fit. Before I epoxied everything I had thought about getting a different outboard to use, something that would fit better, but now I'm glad I took this route. I can always take a saw and chop off the added height if I want to.

I also played around with the cable and pulley steering system and think I finally have it figured out. The problem I have been running into is the height of the outboard means the cable has to come down quite a bit to fit into the pulley. This means instead of drilling a small hole through the coaming, I may have to make a slit in the top of the decking between the coaming and the sheer.